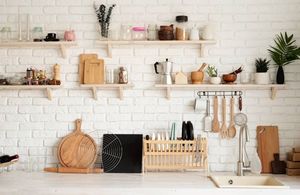
Are you considering DIY remodeling your kitchen but dread the thought of having to demo it all yourself? Turns out, there's an easy way to do it for free! In this post, we'll show you how to take apart your kitchen cabinets and counters with minimal effort. So gather your tools and get ready to start demolition!
How to prepare for a DIY kitchen remodel
Remodeling your kitchen can be a daunting task, but with careful planning and the right tools, it doesn’t have to be. Take stock of your current kitchen and make a list of what you’d like to change. Would you like to replace the cabinets, or just repaint them? Are you considering new countertops or sink & faucet? Once you have a good idea of what you’d like to do, start researching prices and compare them to your budget.
It’s also important to factor in the cost of labor, as most homeowners will need to hire someone to help with the installation. Once you have a clear vision for your kitchen remodel and a realistic budget, it’s time to start shopping for materials.
Home improvement stores can be overwhelming, but if you know what you’re looking for, it’s easy to find what you need. Don’t forget to account for the little details that can make a big difference in your kitchen, like new hardware or light fixtures. With careful planning and a little elbow grease, you can easily transform your kitchen into the room of your dreams.
Disclaimer: We are a participant in the Amazon Services LLC Associates Program. We are also an Affiliate for other Companies and may earn a commission for purchases made thru some of our links.
How to Demo Your Kitchen
Step 1: Clear Out Your Cupboards
The first step in demo-ing your kitchen is to clear out all of the cabinets and cupboards. This can be done by hand, or with the help of a power drill. Begin by removing all of the doors and hardware from the cabinets. Next, use a pry bar to remove the trim around the edges of the cabinet openings. Once the trim has been removed, use a hammer or power drill to remove the screws that are holding the cabinets in place. With the cabinets removed, you'll have access to the plumbing and electrical work that needs to be done.
Step 2: Unhook the Appliances
The next step is to unhook all of the appliances from their respective power sources. Begin by disconnecting the gas line from the stove. Once the gas line has been disconnected, unplug the stove from the electrical outlet. Next, disconnect the water line from the fridge and unplug it from the outlet as well. Finally, remove any other small appliances that may be in your kitchen such as microwaves, blenders, etc.
Step 3: Remove Fixtures
The last step in demo-ing your kitchen is to remove any fixtures that may be in place such as light fixtures, ceiling fans, etc. To remove light fixtures, start by turning off the power to the fixture at your home's breaker box. Once the power has been turned off, use a screwdriver or pair of pliers to remove the screws that are holding the fixture in place. With all of screws removed, carefully lower the fixture down and set it aside. For ceiling fans, follow similar steps but be extra careful when removing screws as they may still be electrically charged.
Voila! You've now successfully completed a DIY kitchen demo! As you can see, it's not as daunting (or expensive) as it may seem at first glance. With a little elbow grease and some patience, you can easily renovate your kitchen on a budget! Stay tuned for our next blog post where we'll show you how to install new cabinets & countertops!
What to do with the demolition debris
The process of knocking down an old building can generate a lot of debris, including concrete, bricks, metal, and wood. While some of this material can be recycled, much of it will end up in landfills. However, there are a few ways to reduce the amount of demolition debris that ends up in dumps.
One option is to use a crushing machine to pulverize the concrete into gravel-sized pieces. This gravel can then be used as fill material or paving stones. Another option is to burn the wood debris in a specially designed incinerator. The heat from the fire will break down the wood fibers, and the resulting charcoal can be used as fuel or sold as a valuable commodity.
By working with a recycling company, it’s possible to minimize the environmental impact of demolition projects.

How to install new kitchen cabinets and counters
Measuring for New Cabinets and Countertops
The first step in installing new cabinets and countertops is to measure the space where they will be installed. You'll need to measure the width of the space, as well as the height from the floor to the bottom of the wall cabinet so that you can order the right size materials. If you're not sure how to measure for new cabinets and countertops, then you can always ask a professional at your local home improvement store for help.
Ordering New Cabinets and Countertops
Once you have your measurements, you can then order the new cabinets and countertops of your choice. There are many different styles of cabinets and countertops to choose from, so be sure to take your time in selecting the materials that will best suit your needs and budget. When ordering new cabinets, make sure to specify if you want them pre-assembled or not. Pre-assembled cabinets are usually more expensive, but they'll save you time and effort during the installation process.
Installing Your New Cabinets and Countertops
After your new cabinets and countertops have been delivered, it's time to start installing them. If you ordered pre-assembled cabinets, then the installation process will be much easier since all you'll need to do is fasten them into place. However, if you ordered unassembled cabinets, then you'll need to put them together before you can install them. Either way, it's important to read all of the instructions that came with your new cabinets and countertops so that you can install them correctly.
What tools you'll need for the job
Safety. Before you start tearing into walls and ripping up flooring, you need to make sure you have the proper safety gear. That includes items like goggles to protect your eyes from flying debris, earplugs to drown out the noise, and a dust mask to avoid breathing in any harmful particles. You should also have a first-aid kit on hand in case of any accidents. Once you have your safety gear squared away, you can move on to the actual demolition.
You'll need some heavy-duty tools to help with the demolition process. A sledgehammer is always a good choice; it can be used to break through drywall and tile without too much effort. You might also want to consider a pry bar or crowbar for removing nails and boards, and a hammer drill for boring holes through concrete or brick walls. Of course, you'll also need a regular ol' hand drill for various smaller tasks. These are just a few of the essential tools you'll need for your kitchen demo; depending on the scope of your project, there may be other specialized tools that you'll need as well.
Once the demolition is complete and all the old materials have been removed from your kitchen, it's time to start cleaning up. A shop vacuum will come in handy for getting rid of all the dust and debris that's left behind, and a power washer can be used to clean any remaining dirt and grime off of the floors and walls. Once everything is clean and sparkling, you'll be ready to start working on your brand new kitchen!
Tips for making the process easier
Make a plan before you start
You'll save yourself a lot of time and effort if you take the time to map out your kitchen demo project before you start tearing things apart. That way, you'll know exactly what needs to be done and where everything is located.
Work from top to bottom
It's usually easiest to start with the uppermost level of your kitchen and work your way down. That way, any debris that falls will be caught by the lower levels, making cleanup much easier.
Don't forget to disconnect utilities
Before you start demolishing anything, be sure to disconnect all utilities (water, gas, electricity) so that you don't accidentally damage any pipes or wiring.
Rent a dumpster
Once you start tearing things out, the debris will start to pile up quickly. To avoid making too much of a mess, rent a dumpster ahead of time so that you can dispose of the waste as you go.
Hire some help
Demolishing a kitchen is a big job, and it's not something that should be attempted alone. If you can afford it, hire a few extra sets of hands to help with the heavy lifting and disposal of materials.
Conclusion
A kitchen remodel can be a big undertaking, but it's definitely doable if you're prepared and have the right tools. With a little planning and some elbow grease, you'll be able to transform your kitchen into the space of your dreams!
Let's do it!


